
Sun Salutation Yoga: 12 Steps of Surya Namaskar Explained

What Is Surya Namaskar?
Surya Namaskar, or Sun Salutation, is one of the most well-known and widely practiced sequences in the world of yoga. The name comes from two Sanskrit words Surya, meaning sun, and Namaskar, meaning greeting or salutation. Together, it means “greeting the sun.”
This sequence is made up of 12 yoga poses that flow from one to the next in a rhythmic pattern. Each movement is linked to the breath, which makes it both a physical exercise and a breathing practice at the same time.
People of all ages practice Surya Namaskar beginners who are just stepping onto the mat for the first time, experienced yogis who have been practicing for years, older adults looking for a gentle full-body routine, and even children in school settings. It is one of the rare practices that can be adapted for almost anyone.
What makes Sun Salutation special is that it is not just a workout. It is a complete practice that works your muscles, improves your breathing, calms your mind, and connects you to a rhythm that feels both simple and deeply satisfying.
At Canada Yoga Studio, we introduce Surya Namaskar to students across many of our classes because it is one of the best starting points for building a consistent yoga practice. Whether you join us for Hatha yoga classes in Calgary or explore our multi-dimensional yoga offerings, you will find Surya Namaskar woven into many sessions.
The History and Meaning Behind Sun Salutation
Sun Salutation has roots in ancient India. For thousands of years, people in the Indian subcontinent recognized the sun as a powerful source of life, energy, and health. Morning rituals that included facing the sun, offering gratitude, and performing physical movements were part of daily life.
The formal yoga sequence we know today as Surya Namaskar was developed and popularized in the early 20th century, though its roots go much further back into traditional yoga texts and practices. It became widely known globally through the spread of modern yoga in the mid and late 20th century.
In yoga philosophy, the sun represents consciousness, vitality, and the life force (prana) that flows through all living things. When you practice Sun Salutation, you are not just stretching muscles. You are acknowledging that life-giving energy and inviting more of it into your body and mind.
Even if you are not drawn to the philosophical side of yoga, the physical benefits alone make Surya Namaskar worth learning. But understanding even a little about its background can add meaning to your practice and help you feel more connected to what you are doing on the mat.
Why Practice Surya Namaskar Every Day?
There is a reason so many yoga teachers recommend starting your day with a few rounds of Surya Namaskar. Here is why:
- It works the whole body. The 12-step sequence moves your spine in every direction forward, back, and neutral while engaging your arms, legs, core, and hips.
- It is efficient. You can complete one full round in less than two minutes. Even five rounds takes under ten minutes.
- It builds consistency. Because it is structured and repeatable, it is easier to commit to than a long, varied routine.
- It sharpens mental focus. The coordination of breath and movement requires attention, which naturally calms a busy mind.
- It is adaptable. You can slow it down for a meditative experience or speed it up for a cardiovascular workout.
- It is free and requires no equipment. All you need is a yoga mat and enough space to stretch out.
Practicing Surya Namaskar every morning, even if it is just three to five rounds, can create a noticeable shift in your energy, mood, and physical health over time.
What You Need Before You Start
Before walking through the 12 steps of Surya Namaskar, here are a few practical things to consider:
Equipment
- A good-quality, non-slip yoga mat
- Comfortable, stretchy clothing that allows free movement
- Bare feet (socks can cause slipping)
Time of Day
- Morning is ideal, preferably on an empty stomach
- Wait at least two to three hours after a meal if practicing later in the day
Warm-Up
- If you are new to yoga or practice in the early morning when your body is stiff, take five minutes to gently warm up with neck rolls, shoulder circles, and standing side stretches before jumping into Surya Namaskar
Space
- You need a space that is roughly six feet long and three feet wide enough to move from standing to a full plank position
The 12 Steps of Surya Namaskar Explained
Here is a detailed breakdown of each pose in the Sun Salutation sequence. We will describe the correct body position, what to do with your breath, and what each step is working in your body.
Step 1: Pranamasana (Prayer Pose)
Breath: Exhale
How to do it:
- Stand at the top of your mat with your feet together or hip-width apart
- Bring your palms together in front of your chest in a prayer position (Namaste gesture)
- Close your eyes briefly, relax your shoulders, and take a slow breath
- Feel grounded and present before you begin
What it does: This is your starting point. It helps you settle your mind, check in with your body, and set an intention for your practice. It activates a sense of awareness before movement begins.
Step 2: Hastauttanasana (Raised Arms Pose)
Breath: Inhale
How to do it:
- As you breathe in, sweep your arms out to the sides and raise them above your head
- Bring your palms together overhead or keep them shoulder-width apart
- Gently arch your upper back and look up slightly do not strain your neck
- Keep your core lightly engaged and your hips stable
What it does: This pose stretches the muscles along the front of your body, opens your chest and lungs, and engages the muscles along your spine. It is a good energizing movement to begin with.
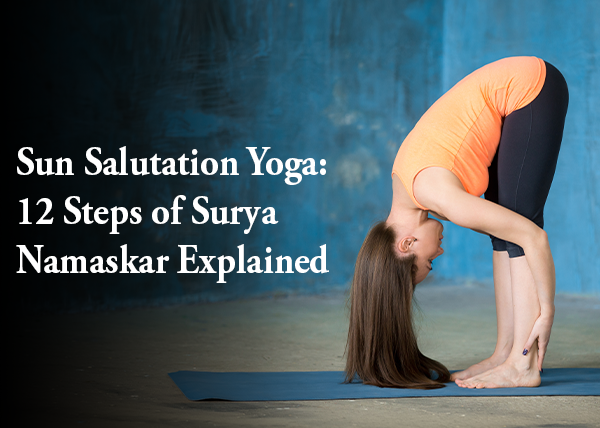
Step 3: Hasta Padasana (Standing Forward Bend)
Breath: Exhale
How to do it:
- As you breathe out, hinge at your hips and fold forward
- Bring your hands toward the floor they can rest on your shins, ankles, or the mat, depending on your flexibility
- Keep a slight bend in your knees if your hamstrings are tight
- Let your head hang naturally toward the ground
What it does: This pose stretches the hamstrings, calves, and lower back. It also encourages blood flow toward your head and calms the nervous system.
Step 4: Ashwa Sanchalanasana (Low Lunge Pose)
Breath: Inhale
How to do it:
- From the forward fold, step your right foot back as far as you can
- Lower your right knee to the mat (or keep it lifted for more challenge)
- Your left foot stays between your hands, with the left knee directly above the left ankle
- Lift your chest, look forward, and let your hips sink slightly toward the ground
What it does: This pose stretches the hip flexors, quadriceps, and groin on the back leg while building strength in the front leg. Hip flexor tightness is common from prolonged sitting, so this step is particularly helpful for many people.
Step 5: Dandasana (Plank Pose)
Breath: Hold (transition)
How to do it:
- Step your left foot back to meet your right foot
- Your body should form a straight line from your head to your heels like the top of a push-up
- Keep your wrists directly under your shoulders
- Engage your core and do not let your hips sag or rise too high
What it does: Plank is a full-body strengthening pose. It works your arms, shoulders, core, glutes, and legs all at once. Even holding it for a breath or two builds functional strength over time.
Step 6: Ashtanga Namaskara (Eight-Limbed Pose)
Breath: Exhale
How to do it:
- From plank, lower your knees to the mat
- Then lower your chest and chin to the mat, keeping your elbows close to your sides
- Your hips stay slightly lifted this is not a full lying-down position
- Eight points of contact touch the ground: two feet, two knees, two hands, chest, and chin
What it does: This pose builds upper body and core strength. It is also a preparation for the backbend that follows. For beginners, this is a gentler alternative to a full Chaturanga (low push-up position).
Step 7: Bhujangasana (Cobra Pose)
Breath: Inhale
How to do it:
- Slide your chest forward and up into a gentle backbend
- Keep your hands under your shoulders and use your back muscles to lift do not push too hard with your hands
- Keep your elbows slightly bent and your shoulders away from your ears
- Look forward or slightly upward without straining your neck
What it does: Cobra stretches the chest, shoulders, and abdomen. It strengthens the muscles along the spine and is particularly good for people who sit at a desk for long periods. It also stimulates the digestive organs gently.
Step 8: Adho Mukha Svanasana (Downward-Facing Dog)
Breath: Exhale
How to do it:
- Tuck your toes under and lift your hips up and back to form an inverted V shape
- Press your hands firmly into the mat and try to lengthen your spine
- Keep a slight bend in your knees if your hamstrings are very tight
- Hold this pose for one to three breaths
What it does: Downward dog stretches the hamstrings, calves, and shoulders. It also decompresses the spine and is considered a mild inversion, which helps calm the nervous system. It is a resting pose in many sequences despite working the whole body.
Step 9: Ashwa Sanchalanasana (Low Lunge Second Side)
Breath: Inhale
How to do it:
- Step your right foot forward between your hands
- Lower your left knee to the mat
- This is the same position as Step 4 but on the opposite side
- Lift your chest and look forward
What it does: This balances the hip flexor stretch from Step 4 on the other side of the body. A full round of Sun Salutation alternates which foot leads in Steps 4 and 9, ensuring both sides get equal attention.
Step 10: Hasta Padasana (Forward Bend Return)
Breath: Exhale
How to do it:
- Step your left foot forward to meet your right and fold forward
- This mirrors Step 3
- Let your hands reach toward the floor and relax your head and neck
What it does: This is the mirror of Step 3 and again works into the hamstrings and lower back. After the backbends and lunges, it feels particularly releasing.
Step 11: Hastauttanasana (Raised Arms Return)
Breath: Inhale
How to do it:
- Sweep your arms out and up as you rise back to standing
- This mirrors Step 2
- Reach up and slightly back with a gentle arch
What it does: Rising back up opens the chest and front body one more time and reverses the forward fold. This upward movement reinvigorates energy.
Step 12: Tadasana (Mountain Pose / Return to Prayer)
Breath: Exhale
How to do it:
- Bring your hands back to prayer position at your chest
- Stand tall with your feet together
- Take a breath and pause before your next round
What it does: This returns you to the starting position. It is a moment to feel the effects of the sequence and prepare for the next round. Standing quietly here even for one or two breaths can deepen your awareness and make the practice more than just a physical exercise.
Breathing Guide for Each Step
Breath is the most important element of Sun Salutation. Here is a quick reference:
| Step | Pose | Breath |
| 1 | Prayer Pose | Exhale |
| 2 | Raised Arms | Inhale |
| 3 | Forward Bend | Exhale |
| 4 | Low Lunge (right leg back) | Inhale |
| 5 | Plank | Hold/Transition |
| 6 | Eight-Limbed Pose | Exhale |
| 7 | Cobra | Inhale |
| 8 | Downward Dog | Exhale |
| 9 | Low Lunge (left leg back) | Inhale |
| 10 | Forward Bend | Exhale |
| 11 | Raised Arms | Inhale |
| 12 | Mountain/Prayer | Exhale |
How Many Rounds Should You Do?
This depends entirely on your experience level and your goals for the day.
- Absolute beginners: Start with 2 to 3 rounds and see how your body feels the next morning
- Intermediate practitioners: 6 to 12 rounds is a solid daily practice
- Advanced practitioners or fitness goals: 12 to 24 rounds is common in traditional and intensive practices
- For weight loss or cardio benefit: 12 rounds or more performed at a moderate to brisk pace
Remember that one complete set of Surya Namaskar includes two rounds one where the right leg leads in the lunge, and one where the left leg leads so that both sides of the body are worked equally.
Common Mistakes to Avoid
Even students who have been practicing for a while can fall into habits that reduce the effectiveness of the sequence or lead to discomfort. Watch out for these:
- Rushing through the poses. Moving too fast disconnects you from your breath and reduces the benefits. Keep a steady, unhurried pace.
- Forgetting to breathe. The breath is what makes this a yoga practice. If you find yourself holding your breath, slow down.
- Sinking in the plank. A sagging lower back in plank can stress the lumbar spine. Engage your core to keep your body in a straight line.
- Locking your elbows in cobra. Keep a gentle bend in your elbows and lead the lift with your back muscles, not your arms.
- Placing the knee past the ankle in the lunge. Your front knee should stack above your front ankle, not beyond your toes.
- Skipping the pause at the end. Standing quietly in Mountain Pose between rounds is not wasted time it is where much of the benefit is absorbed.
Modifications for Beginners, Seniors, and Pregnant Women
Surya Namaskar can be adapted to suit almost every body. Here are some thoughtful adjustments:
For Beginners
- Keep your knees bent in forward folds
- Do Cobra instead of Upward Dog
- Use the Eight-Limbed Pose instead of Chaturanga
- Move slowly and focus on learning the sequence rather than doing many rounds
For Seniors or Those with Joint Issues
- Practice against a wall for balance support in standing poses
- Use a chair for modified lunges
- Keep plank very brief or replace it with a gentler transition
- Work with a teacher to find what feels comfortable
For Pregnant Women
- Avoid deep forward folds as the belly grows
- Widen your stance to accommodate your belly in forward-leaning poses
- Skip Cobra or replace it with a supported heart opener
- Avoid lying flat on your back after the first trimester
At Canada Yoga Studio, we offer dedicated prenatal yoga in Canada classes that carefully guide expectant mothers through safe, nurturing movement including adapted versions of Sun Salutation. We also have ` classes for new mothers returning to practice after birth.
Health Benefits of Surya Namaskar
The benefits of a consistent Surya Namaskar practice are both immediate and long-term. Here is what research, traditional yoga knowledge, and the experience of thousands of practitioners point to:
Physical Benefits
- Improved flexibility in the spine, hips, hamstrings, and shoulders
- Stronger muscles in the arms, legs, core, and back
- Better posture from repeated spinal extension and flexion
- Improved circulation from the combination of inversions and backbends
- Stimulation of the digestive system through abdominal compression and extension
- Better lung capacity due to the coordinated breathing pattern
Mental and Emotional Benefits
- Reduced stress and anxiety the focus on breath calms the nervous system
- Greater mental clarity starting your day with an intentional practice sets a focused tone
- Improved sleep when practiced regularly, especially in the early morning
- Mood improvement from the combination of movement, breath, and mindfulness
Energetic Benefits (from a yoga perspective)
- Activation of the solar plexus chakra (Manipura), which is associated with confidence and willpower
- Balancing of prana (life energy) in the body
- A sense of vitality and readiness to engage with the day
Sun Salutation and Weight Loss
Many people ask whether Surya Namaskar can help with weight management. The answer is yes with some context.
A single round of Sun Salutation burns approximately 13 to 15 calories, though this varies based on your body size, pace, and effort level. Doing 12 rounds burns roughly 150 to 180 calories comparable to a brisk walk.
But the bigger benefit is not just calorie burning in the moment. Regular Surya Namaskar practice:
- Builds lean muscle mass, which increases your resting metabolism
- Reduces cortisol (the stress hormone), which is linked to belly fat storage
- Improves digestion, which supports healthier body composition
- Develops body awareness, which often leads to healthier food choices naturally
For best results, combine Surya Namaskar with a balanced, whole-food diet and other healthy lifestyle habits. Our nutrition and wellness coaching at Canada Yoga Studio can support you in building a complete approach to health that goes beyond the mat.
Best Time to Practice Sun Salutation
Traditionally, Surya Namaskar is performed at sunrise, facing the direction of the rising sun. This is not just poetic there are practical reasons for it:
- The body has rested overnight and is ready for gentle, rhythmic movement
- Morning light exposure helps regulate your circadian rhythm and improve sleep patterns
- Practicing before the demands of the day begin means it actually gets done
That said, any time you can practice is the right time. Evening Surya Namaskar practiced slowly can be a wonderful wind-down before bed. A midday session can break up a long period of sitting and restore energy.
The main guideline is to avoid practicing immediately after a meal. Wait at least two hours after eating before doing a full sequence.
Surya Namaskar for Kids
Children take to Sun Salutation naturally. The flowing movements, the connection to nature and the sun, and the rhythm of the sequence all appeal to younger minds and bodies.
For children, Surya Namaskar offers:
- Improved body coordination and spatial awareness
- A healthy outlet for energy
- Focus and attention training
- Introduction to breathing as a calming tool
- A foundation for lifelong physical wellbeing
At Canada Yoga Studio, our kids yoga sessions incorporate age-appropriate versions of Surya Namaskar in a fun, playful environment. We use creative language (like calling Cobra Pose “the sunshine snake”) to make the sequence engaging and memorable for younger students.
Surya Namaskar and Other Yoga Practices at Canada Yoga Studio
At Canada Yoga Studio, Surya Namaskar is just one piece of a much larger offering. Whether you are brand new to yoga or have been practicing for years, there is something here for every stage of your journey.
Hatha Yoga Classes in Calgary
Our Hatha yoga classes are a wonderful place to learn Sun Salutation properly. Hatha yoga moves at a steady, accessible pace that gives you time to understand each pose before moving on. It is one of the most traditional and well-rounded styles of yoga available.
Multi-Dimensional Yoga
Our multi-dimensional yoga classes bring together different layers of yoga practice movement, breath, meditation, and energetic awareness. For students who want to go deeper than the physical, this approach integrates Surya Namaskar as a foundation while expanding into more subtle practices.
Kundalini Yoga
Kundalini yoga uses movement, breath, chanting, and meditation to work with energy in the body. While it follows a different format than a traditional Surya Namaskar sequence, many of the principles breath, flow, and energetic awareness are closely related.
Sound Healing
After an energizing Surya Namaskar practice, sound healing in Calgary provides a deeply restorative experience. The vibrations from singing bowls and other instruments help the nervous system settle and integrate the benefits of movement practice.
Pranic and Aura Cleansing
Our pranic aura cleansing sessions work with the energy field around the body, which is directly connected to the yogic understanding of prana the life force that Surya Namaskar is said to cultivate and balance.
Nutrition and Wellness Coaching
Yoga and nutrition go hand in hand. Our nutrition and wellness coaching helps you support your physical practice with food choices that nourish your body, support your energy levels, and help you reach your health goals.
Frequently Asked Questions
Can I do Surya Namaskar every day?
Yes. Daily practice is actually recommended. It is gentle enough on the joints to be done every day, especially if you keep the pace moderate and listen to your body. On days when you feel tired or sore, doing fewer rounds slowly is better than skipping entirely.
Can I do Surya Namaskar if I have back pain?
It depends on the cause of your back pain. Many people find that consistent, mindful Surya Namaskar practice actually reduces chronic lower back pain by strengthening the surrounding muscles and improving flexibility. However, if you have an acute injury or disc issues, speak with your doctor and work with an experienced yoga teacher before starting. A qualified instructor can modify poses to keep you safe.
Do I need to know all 12 steps perfectly before I start?
Not at all. It is perfectly fine to learn two or three poses at a time and build the sequence gradually. Many beginners start by learning just the standing portion steps 1 through 3 and steps 10 through 12 and add the floor poses as they gain confidence.
Is Surya Namaskar the same as regular exercise?
It shares some qualities with exercise it builds strength, burns calories, and gets your heart rate up. But it also includes breathwork and mindfulness, which most conventional exercise does not. Think of it as a practice that bridges movement, breath, and mind rather than purely physical training.
How long does it take to see results?
Many people notice improved flexibility, better sleep, and more stable energy levels within two to four weeks of daily practice. Strength improvements take a bit longer typically six to eight weeks. Mental and emotional benefits, like reduced stress and greater calm, are often felt within the first few sessions.
Can I practice Surya Namaskar during my period?
Traditional yoga teachings suggest avoiding very intense practice during the first one or two days of menstruation. A gentle, slow Surya Namaskar with modifications is generally fine for most people. However, some individuals prefer to rest and practice restorative yoga during this time. Trust your body and do what feels right.
Conclusion
Surya Namaskar Sun Salutation is one of the most complete and accessible practices in all of yoga. With just 12 steps, it covers your entire body, engages your breath, and gives your mind a moment of focused stillness each day. Whether you practice three rounds or twenty, slowly or with energy, the benefits build over time in a way that is hard to match with any single exercise or wellness habit.
We hope this guide has made the sequence feel clear, approachable, and worth trying. Start with where you are even if that means just learning the standing poses today. Gradually, the whole sequence will feel natural and even enjoyable.
If you are ready to learn Surya Namaskar properly, deepen an existing practice, or explore the many other paths that yoga offers, we warmly invite you to visit us at Canada Yoga Studio. Our teachers bring care, knowledge, and genuine warmth to every class whether it is Hatha yoga in Calgary, prenatal yoga, kids yoga, or sound healing.
Your practice begins with a single step. Let that step be today.
📩 Have questions about which class is right for you? Contact Canada Yoga Studio and let us help you find the perfect fit for your body, schedule, and goals.
🧘 Ready to join a class? Browse our full range of offerings at canadayogastudio.com and take your first step toward a healthier, more balanced life.
Related Reading: