
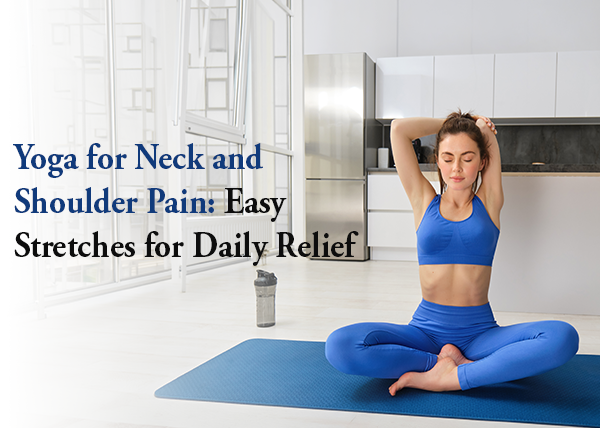
Yoga for Neck and Shoulder Pain: Easy Stretches for Daily Relief

Why Neck and Shoulder Pain Is So Common
If you have ever woken up with a stiff neck or felt your shoulders creeping up toward your ears after a long day at work, you are not alone. Neck and shoulder pain is one of the most common physical complaints among adults today, and it affects people of all ages and lifestyles.
There are several reasons why this area of the body tends to hold so much tension:
- Long hours at a desk or computer: Sitting in front of a screen for hours on end causes the head to drift forward, putting extra strain on the neck muscles. This position, often called “tech neck,” places up to four times more pressure on the cervical spine than normal.
- Smartphone use: Looking down at your phone for extended periods compresses the muscles and joints in the neck and upper back.
- Poor posture: Slouching, hunching the shoulders, or sitting with your spine unsupported can tighten the muscles across your upper back and shoulders over time.
- Stress and anxiety: When you are under stress, your body naturally tenses up, and the shoulders and neck are usually the first places to feel it.
- Lack of movement: A sedentary lifestyle means your muscles are not getting the regular stretching and movement they need to stay flexible and pain-free.
- Sleep position: Sleeping on your stomach or with the wrong pillow can leave you waking up with stiffness or soreness in the neck.
These factors, either individually or combined, can create a cycle of tightness, discomfort, and reduced range of motion that makes even simple movements feel difficult. The good news is that yoga for neck and shoulder pain offers a gentle, effective, and accessible way to break that cycle, right from the comfort of your home.
How Yoga Helps Relieve Neck and Shoulder Pain ?
Yoga is not just about flexibility or relaxation. It is a complete practice that works on the body, the breath, and the mind together. When it comes to neck and shoulder pain, yoga offers several real, practical benefits:
Releases Muscle Tension
Many yoga poses gently lengthen and stretch the muscles in the neck, shoulders, and upper back. This helps reduce the tightness that builds up from poor posture or repetitive movements throughout the day.
Improves Posture
A consistent yoga practice strengthens the muscles that support the spine and keeps the head aligned properly over the shoulders. Better posture means less strain on the neck and shoulder muscles over time.
Increases Blood Circulation
Stretching and movement improve circulation to the muscles and soft tissues in the neck and shoulder area. Better blood flow helps deliver oxygen and nutrients to tired, sore muscles and supports faster recovery.
Reduces Stress
Since stress is one of the biggest contributors to neck and shoulder tension, the calming nature of yoga, especially when combined with breathwork, can directly ease the physical tightness that comes from emotional stress.
Builds Body Awareness
Yoga teaches you to notice how you are holding your body throughout the day. Once you become aware of habits like raised shoulders or a forward head position, you can make small adjustments that protect your neck and shoulders over time.
Studies have also supported the use of yoga for musculoskeletal pain. According to research published in the Journal of Pain Research, yoga interventions have shown positive results in reducing chronic neck pain and improving the quality of life for those who practice consistently.
Before You Begin: Safety Tips and Precautions
Before you start practicing yoga stretches for neck and shoulder pain, there are a few important things to keep in mind:
- Talk to your doctor first if you have a diagnosed condition like a herniated disc, cervical stenosis, or a recent injury. Not all stretches are suitable for every condition.
- Move slowly and gently. The neck is a sensitive area. Never jerk, bounce, or force a stretch.
- Stop if something hurts. A mild sensation of stretching is normal, but sharp, shooting, or worsening pain is a signal to stop immediately.
- Use props when needed. A folded blanket, yoga block, or bolster can help you get into a comfortable position without straining.
- Breathe throughout every pose. Holding your breath increases tension. Keep your breathing steady and relaxed.
- Practice on a yoga mat for comfort and grip, especially for floor-based poses.
Best Yoga Poses for Neck and Shoulder Pain Relief
Here are ten of the most effective and beginner-friendly yoga poses for neck and shoulder pain. Each pose is described with clear steps so you can practice safely at home.
1. Child’s Pose (Balasana)
Why it helps: Child’s Pose gently lengthens the spine, releases tension in the upper back, and allows the shoulders to spread wide, which helps ease tightness between the shoulder blades.
How to do it:
- Start on your hands and knees on a yoga mat.
- Bring your big toes together and widen your knees to about hip-width apart.
- Slowly sit your hips back toward your heels.
- Extend your arms out in front of you on the mat, palms facing down.
- Let your forehead rest on the mat or on a folded blanket.
- Breathe deeply and allow your shoulders to soften toward the floor.
- Hold for 30 seconds to 2 minutes.
Tip: If your hips do not reach your heels, place a folded blanket between your hips and ankles for support.
2. Cat-Cow Stretch (Marjaryasana-Bitilasana)
Why it helps: This dynamic movement warms up the entire spine, loosens the neck and shoulder muscles, and encourages better posture by mobilizing the upper back.
How to do it:
- Start on all fours with your wrists under your shoulders and knees under your hips.
- Inhale, drop your belly toward the mat, lift your chest and tailbone (Cow Pose).
- Exhale, round your spine toward the ceiling, tuck your chin to your chest, and pull your navel in (Cat Pose).
- Move slowly between these two positions, syncing your breath with each movement.
- Repeat 8 to 10 times.
Tip: Let your head move naturally with the spine. In Cow Pose, gaze softly forward. In Cat Pose, let the head hang gently down.
3. Thread the Needle Pose
Why it helps: This pose is one of the best for releasing tightness in the upper back and the space between the shoulder blades. It also provides a lovely stretch through the back of the shoulder.
How to do it:
- Start on all fours.
- Inhale and lift your right arm up toward the ceiling, opening your chest to the right.
- Exhale and slide your right arm under your left arm, palm facing up, until your right shoulder and ear rest on the mat.
- Keep your hips level and your left arm extended or press the left palm into the mat for support.
- Hold for 30 seconds to 1 minute, then repeat on the other side.
Tip: Do not force the shoulder down. Let gravity do the work as you breathe and relax into the pose.
4. Eagle Arms (Garudasana Arms)
Why it helps: Eagle Arms is a powerful shoulder stretch that targets the muscles between and around the shoulder blades, areas that often become very tight from desk work and poor posture.
How to do it:
- Sit comfortably in a chair or cross-legged on the floor.
- Extend both arms in front of you at shoulder height.
- Cross your right arm over the left, bending both elbows so the backs of your hands face each other.
- Try to wrap your forearms so that your palms come together (or as close as they can).
- Lift your elbows slightly and pull them away from your face to deepen the stretch.
- Hold for 5 to 8 breaths, then switch sides.
Tip: If your hands cannot meet, simply hold onto a strap or use the back of your hands touching as your version of the pose.
5. Standing Forward Fold (Uttanasana)
Why it helps: When done with arms clasped behind the back, this pose opens the shoulders and chest while releasing tension down the entire back of the neck.
How to do it:
- Stand with your feet hip-width apart.
- Clasp your hands together behind your back.
- Inhale to lengthen your spine, then exhale and fold forward from the hips.
- Let your head hang toward the floor and allow your clasped arms to lift up and over your head toward the ground.
- Bend your knees slightly if your hamstrings are tight.
- Hold for 5 to 8 breaths.
Tip: Do not lock your knees. A soft bend in the knees keeps the lower back safe and allows you to focus the stretch on the shoulders and neck.
6. Seated Neck Stretches
Why it helps: These simple seated stretches directly target the muscles on the sides and back of the neck. They are ideal for doing at your desk or at any point during your day.
How to do it:
Side Neck Stretch:
- Sit tall in a chair or on the floor.
- Drop your right ear toward your right shoulder without lifting the left shoulder.
- To deepen the stretch, gently place your right hand on the left side of your head (no pulling).
- Hold for 5 breaths, then switch sides.
Chin to Chest Stretch:
- Sit tall and slowly drop your chin toward your chest.
- Feel the stretch along the back of your neck.
- Hold for 5 breaths.
Neck Rotation:
- Sit tall and slowly turn your head to the right, looking over your right shoulder.
- Hold for 3 breaths, then return to center and repeat on the left.
Tip: Never roll your head in a full circle. This can compress the vertebrae at the back of the neck. Stick to the movements described above.
7. Puppy Pose (Uttana Shishosana)
Why it helps: Sometimes called the “heart-melting pose,” Puppy Pose provides a deep stretch through the shoulders and the upper back, making it very effective for tight shoulders.
How to do it:
- Start on all fours.
- Keep your hips above your knees as you walk your hands forward on the mat.
- Lower your chest and forehead toward the mat, leaving your hips where they are.
- Let your arms stretch long in front of you.
- If comfortable, rest your forehead or chin on the mat.
- Hold for 5 to 10 breaths.
Tip: If you feel too much in your lower back, move your knees a little wider. The focus should be on opening the chest and shoulders.
8. Cow Face Pose Arms (Gomukhasana Arms)
Why it helps: This pose stretches different parts of the shoulder at the same time: the arm reaching up stretches the tricep and upper shoulder, while the arm reaching down stretches the front of the shoulder and chest.
How to do it:
- Sit tall in a chair or on the floor.
- Reach your right arm up toward the ceiling, then bend the elbow and drop your right hand down behind your head.
- Bring your left arm out to the side, then bend the elbow and reach your left hand up behind your back.
- Try to clasp your fingers together behind your back.
- If your hands do not reach, hold a strap or a folded towel between them.
- Hold for 5 to 8 breaths, then switch sides.
Tip: Keep your head upright and avoid letting it push forward. The back of your head should gently rest against your upper arm.
9. Sphinx Pose
Why it helps: Sphinx Pose gently opens the chest and strengthens the muscles that run along the upper spine, which helps counteract the rounded-shoulder posture that leads to neck and shoulder pain.
How to do it:
- Lie on your stomach on the mat.
- Prop yourself up on your forearms, with elbows directly under your shoulders.
- Press your forearms and palms into the mat and lift your chest.
- Roll your shoulder blades down your back, away from your ears.
- Keep your neck long and gaze softly ahead.
- Hold for 5 to 10 breaths.
Tip: Do not compress the lower back by lifting too high. The goal is a gentle lift that opens the chest without straining.
10. Legs Up the Wall (Viparita Karani)
Why it helps: While this is largely a restorative pose, Legs Up the Wall helps calm the nervous system, reduce overall body tension, and allow the neck and shoulders to fully relax when you use a folded blanket under your upper back.
How to do it:
- Sit sideways next to a wall, with your hip touching the wall.
- Swing your legs up the wall as you lower your back to the floor.
- Your body should form an L-shape.
- Place a folded blanket under your upper back and shoulders if you like.
- Relax your arms by your sides, palms facing up.
- Close your eyes and breathe naturally.
- Stay here for 5 to 15 minutes.
Tip: This is the perfect pose to end your yoga session. Let your whole body melt into the floor.
A Simple 10-Minute Daily Yoga Routine for Neck and Shoulder Pain
You do not need an hour to start feeling better. This quick, 10-minute daily routine combines the poses above into a simple sequence you can do every morning or evening:
| Step | Pose | Duration |
| 1 | Seated Neck Stretches (all three) | 2 minutes |
| 2 | Cat-Cow Stretch | 1 minute |
| 3 | Thread the Needle (both sides) | 2 minutes |
| 4 | Eagle Arms (both sides) | 1 minute |
| 5 | Child’s Pose | 2 minutes |
| 6 | Legs Up the Wall | 2 minutes |
How to use this routine:
- Do this routine in the morning to loosen up before your day starts.
- Repeat the seated stretches at your desk during a lunch break.
- Do the full routine again in the evening if you have had a particularly tense day.
Consistency is the most important thing. Even five minutes of these stretches done every day will lead to noticeable improvements in neck and shoulder comfort over time.
Breathing Techniques That Support Neck and Shoulder Relief
One of the most overlooked parts of yoga for pain relief is the breath. How you breathe directly affects how much tension you hold in your body. When you breathe shallowly or hold your breath, your neck and shoulder muscles tend to tighten up. Here are two simple breathing techniques to practice alongside your yoga stretches:
Diaphragmatic Breathing (Belly Breathing)
- Sit or lie down comfortably.
- Place one hand on your belly and one on your chest.
- Inhale slowly through your nose, letting your belly rise first, then your chest.
- Exhale slowly through your nose or mouth, letting the belly fall.
- Repeat for 5 to 10 breaths.
This type of breathing activates the parasympathetic nervous system, which tells your body it is safe to relax. Your shoulders naturally drop and your neck muscles soften when you breathe this way.
4-7-8 Breathing
- Inhale through your nose for 4 counts.
- Hold the breath for 7 counts.
- Exhale slowly through your mouth for 8 counts.
- Repeat 4 times.
This technique is particularly helpful when you are feeling stressed or when tension in the neck and shoulders is tied to anxiety.
Lifestyle Tips to Prevent Neck and Shoulder Tension
Your yoga practice will be much more effective if you also make small changes to your daily routine. Here are some simple habits that can help prevent neck and shoulder pain from building up in the first place:
- Adjust your workstation: Your computer screen should be at eye level. Your chair should support your lower back, and your feet should be flat on the floor. Your keyboard and mouse should be at a height that keeps your elbows at 90 degrees.
- Take regular movement breaks: Set a timer to stand up and move for two to three minutes every hour. A short walk, a few shoulder rolls, or a quick neck stretch can make a big difference.
- Check your sleep setup: Use a pillow that keeps your head in a neutral position. If you sleep on your side, make sure your pillow fills the space between your shoulder and ear without pushing your head up too high.
- Hold your phone at eye level: Rather than looking down at your phone, bring it up to eye level as much as possible when reading or scrolling.
- Drink enough water: Dehydrated muscles are more prone to cramping and tension. Aim for at least 8 glasses of water per day.
- Practice good posture throughout the day: Keep your ears stacked over your shoulders, your shoulders over your hips, and avoid locking your knees when standing. Small, consistent postural adjustments add up over time.
- Reduce stress where you can: Stress is one of the biggest contributors to neck and shoulder pain. Whether it is a short walk outside, journaling, or a few minutes of meditation, finding ways to decompress daily will help your body stay relaxed.
How Canada Yoga Studio Can Help You
If you are looking for guidance, support, and a welcoming community to help you build a consistent yoga practice, Canada Yoga Studio is here for you.
At Canada Yoga Studio, we offer a wide range of classes designed for people of all levels, from complete beginners to experienced practitioners. Whether you are looking for a gentle yoga class that focuses on mobility and pain relief or a more energetic practice that builds strength and flexibility, you will find something that fits your needs.
Here is what makes practicing with Canada Yoga Studio a great choice for anyone dealing with neck and shoulder pain:
- Experienced instructors who understand body mechanics and can provide modifications for pain or injury
- Classes specifically designed for tension relief and posture correction
- Flexible scheduling so you can practice at times that work for your life
- A supportive, non-judgmental community where everyone is welcome regardless of age, fitness level, or experience
- Online and in-person options so you can practice from home or come in for guided sessions
Whether you prefer the energy of a group class or the personal attention of a one-on-one session, Canada Yoga Studio has options to help you start feeling better.
👉 Visit Canada Yoga Studio to explore class schedules, sign up for a free trial, and begin your journey toward a pain-free neck and shoulders today.
Frequently Asked Questions
Can yoga actually fix neck and shoulder pain?
Yoga can be very effective for reducing and managing neck and shoulder pain, especially when it is caused by muscle tension, poor posture, or stress. However, it is not a replacement for medical treatment if you have a structural issue like a herniated disc or nerve compression. Always speak to your doctor if you are unsure about the cause of your pain.
How often should I do yoga for neck and shoulder pain?
Even 10 to 15 minutes of gentle stretching done daily will produce noticeable results over time. Practicing 3 to 5 times per week is a great starting point. Consistency matters more than duration.
Is yoga safe if I have a neck injury?
It depends on the injury. Many gentle yoga poses are safe and even beneficial after a neck injury, but some movements should be avoided. Always get clearance from your healthcare provider before starting and let your yoga instructor know about any injuries so they can offer appropriate modifications.
What type of yoga is best for neck and shoulder pain?
Gentle yoga, restorative yoga, and Yin yoga are generally the most beneficial styles for neck and shoulder pain. These practices focus on slow, sustained stretches and relaxation rather than vigorous movement.
Can I do these stretches at my desk?
Yes! The seated neck stretches and Eagle Arms pose can be done easily at your desk without needing a mat. Taking even two minutes to stretch every hour can significantly reduce the buildup of tension in the neck and shoulders.
How long before I see results?
Many people notice some relief after just one or two sessions. For more lasting results, most people start to see significant improvement after two to four weeks of consistent practice.
Final Thoughts
Neck and shoulder pain does not have to be a permanent part of your daily life. With a little consistency and the right approach, yoga for neck and shoulder pain can genuinely help you move more freely, feel less tense, and go about your day with greater comfort.
The ten poses covered in this guide are designed to be gentle, accessible, and easy to fit into a busy schedule. You do not need to be flexible, young, or experienced in yoga to benefit from these stretches. You just need to start, take it slowly, and give your body the time and space it needs to respond.
Start with the 10-minute daily routine, pay attention to how you breathe, and make a few small adjustments to your daily habits. Over time, you will begin to notice that your shoulders are lower, your neck feels looser, and your overall sense of physical comfort has improved.
And when you are ready to take your practice to the next level or want some in-person guidance, remember that Canada Yoga Studio is here to support you every step of the way.
Did you find this guide helpful? Share it with someone who could use a little neck and shoulder relief. And if you have tried any of these poses, we would love to hear how they worked for you, drop a comment or reach out to us at Canada Yoga Studio.