
Sun Salutation (Surya Namaskar): 12 Poses, Benefits & Beginner’s Guide

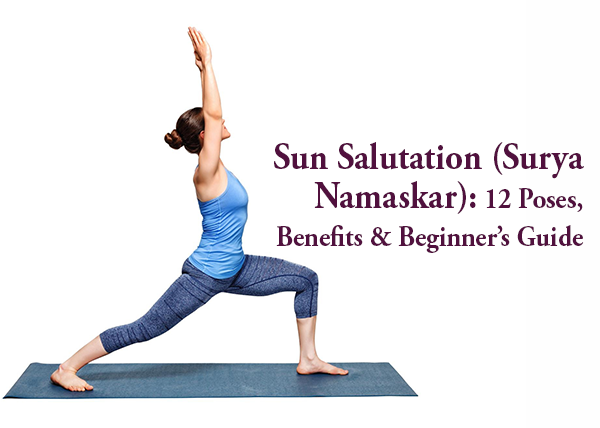
Surya Namaskar widely known in English as Sun Salutation looks like one smooth, continuous flow when you see it done well. In reality, it is a coordinated sequence of postures, transitions and breathing that moves through 12 positions in the Hatha-based form most commonly taught today. Different yoga traditions teach the sequence with some variation, so what you see in one studio may look slightly different from another, and that is completely normal. As a beginner, you do not need speed, flexibility or a high number of repetitions to start. You simply need to understand the sequence. If you prefer to learn alignment, breathing and sequence variations with hands-on guidance, Canada Yoga Studio’s guided Surya Namaskar Workshop is designed exactly for that.
What Is Surya Namaskar?
Surya Namaskar, or Sun Salutation, is a flowing yoga sequence that coordinates a series of postures with intentional breathing and mindful movement. The commonly taught Hatha version moves through 12 positions that alternate between forward-folding, extending and weight-bearing shapes. The exact names and order of poses can vary between yoga traditions, so treat the 12-position structure as a widely used framework rather than a single universal standard.
Why Do Surya Namaskar Sequences Look Different?
If you have searched for Sun Salutation online, you have probably noticed that the poses look slightly different across videos, books and studios. This is not because one version is wrong. It reflects genuinely different teaching traditions.
The main variations you will encounter include:
- Hatha Surya Namaskar a more deliberate sequence where individual positions are held with careful breath coordination
- Ashtanga Sun Salutation A a dynamic, flow-oriented version that forms the opening of the Ashtanga Primary Series
- Ashtanga Sun Salutation B an extended Ashtanga variation that introduces additional poses
- Other lineage-specific or modified sequences adapted for specific populations or teaching contexts
Canada Yoga Studio teaches multiple variations including Hatha Surya Namaskar, Ashtanga Sun Salutation A, and Ashtanga Sun Salutation A combined with B. For the main instructional sequence in this article, the traditional Hatha version is used because it works well for beginners learning positions and breath coordination together.
12 Poses of Surya Namaskar: Step-by-Step Beginner Guide
This is the heart of the article. Work through each position slowly and try to stay connected to your breathing throughout.
Pose 1 Pranamasana (Prayer Pose)
Stand at the front of your mat with feet together or hip-distance apart if that feels more stable. Bring your palms together at the centre of your chest and let your shoulders drop away from your ears. Take a natural breath here and allow your body to settle before beginning the sequence.
Breath: Natural, steady exhale or neutral breath.
Alignment note: Avoid gripping your hands tightly. Keep the palms gently pressed together and the chest open.
Pose 2 Hasta Uttanasana (Raised Arms Pose)
On an inhale, sweep both arms overhead and lengthen upward through your spine. The goal here is length, not depth. Rather than collapsing into your lower back to create a dramatic arch, think about reaching your arms slightly forward and up while your feet stay grounded.
Breath: Inhale as you lift.
Modification: Keep a slight bend at the elbows if raising straight arms creates shoulder discomfort. Go only as far back as is comfortable.
Pose 3 Hasta Padasana (Standing Forward Fold)
On an exhale, hinge from your hips and fold forward and down. Your hands move toward the floor beside your feet. If your hands do not reach the floor, bend your knees generously this is a completely normal starting point and does not reduce the value of the position. Let your head and neck be relaxed.
Breath: Exhale as you fold.
Modification: Use yoga blocks on either side of your feet if bending your knees still does not bring your hands close enough to a comfortable position.
Pose 4 Ashwa Sanchalanasana (Equestrian Pose)
On an inhale, step your right leg back into a low lunge. Your left knee stays above your left ankle. Your right knee can come to the floor to begin with. Place your fingertips on the floor or on blocks on either side of your front foot. Look forward gently.
Breath: Inhale as you step back.
Alignment note: Avoid letting your front knee drift inward. Keep it tracking over your second toe.
Modification: Rest the back knee on the mat if the full lunge position feels unstable.
Pose 5 Parvatasana (Mountain Pose / Downward-Facing Dog)
On an exhale, bring your left foot back to join your right foot. Press your hips upward and back into an inverted V shape. Hands are shoulder-width apart, feet hip-width apart. Knees can stay bent if your hamstrings are tight. Let your spine lengthen rather than rounding.
Breath: Exhale as you move into this position.
Modification: Keep a generous bend in both knees to maintain a long spine. It is more useful to have a flat back with bent knees than straight legs with a rounded back.
Pose 6 Ashtanga Namaskara (Eight-Limbed Salute)
From the previous position, lower your knees to the floor first, then bring your chest and chin down to rest on the mat. Your hips stay lifted above the floor. The eight points of contact are: both feet, both knees, both hands, chest and chin.
Breath: Exhale (or a brief transition breath) as you lower.
Modification: If this position creates wrist or shoulder discomfort, move more slowly and reduce the amount of body weight you shift forward. This transition is often the most unfamiliar for beginners.
Pose 7 Bhujangasana (Cobra Pose)
On an inhale, slide your chest forward and lift it upward. Keep your elbows bent they do not need to straighten. Press the tops of your feet into the mat, keep your shoulders away from your ears and lift only as high as feels comfortable. A low Cobra with your elbows clearly bent is a perfectly valid position.
Breath: Inhale as you lift.
Alignment note: Avoid pressing into your hands to push yourself higher than your back strength currently supports. The lift should come from your back muscles, not purely from your arms.
Pose 8 Parvatasana (Mountain Pose / Downward-Facing Dog)
On an exhale, tuck your toes, press into your palms and lift your hips back up into the inverted V shape from Pose 5. Hold for a breath or move through fluidly depending on your pace.
Breath: Exhale as you lift the hips.
Note: This mirrors Pose 5 and is often referred to as the midpoint of the sequence.
Pose 9 Ashwa Sanchalanasana (Equestrian Pose Opposite Side)
On an inhale, step your left foot forward between your hands into a low lunge. Your right knee may come to the floor. This mirrors Pose 4 on the other side.
Breath: Inhale as you step the foot forward.
Note: Stepping the foot all the way forward can feel difficult at first. Use your hand to help guide the foot if needed this is common and practical.
Pose 10 Hasta Padasana (Standing Forward Fold)
On an exhale, bring your right foot forward to join your left. You are back in the standing forward fold from Pose 3. Knees may remain bent. Let the head and neck hang.
Breath: Exhale as you step the foot forward and fold.
Pose 11 Hasta Uttanasana (Raised Arms Pose)
On an inhale, sweep both arms out and upward, rising back to the raised arms position from Pose 2. Lengthen through the spine with the same intention as before.
Breath: Inhale as you rise.
Alignment note: Keep the movement controlled. There is no need to rush this transition.
Pose 12 Pranamasana (Prayer Pose)
On an exhale, bring your hands back together at your chest and return to the starting position. This completes the 12-position sequence.
About rounds: In the traditional Hatha approach taught at Canada Yoga Studio, one complete round of Surya Namaskar involves performing the full 12-position sequence twice once stepping the right leg back first in Pose 4 and once stepping the left leg back first. This creates a 24-step, bilaterally balanced practice. So one round = both sides. Beginners often benefit from treating each side as its own practice session initially.
Surya Namaskar 12 Poses at a Glance
| Step | Sanskrit Name | English Name | Breath |
| 1 | Pranamasana | Prayer Pose | Neutral / Exhale |
| 2 | Hasta Uttanasana | Raised Arms Pose | Inhale |
| 3 | Hasta Padasana | Standing Forward Fold | Exhale |
| 4 | Ashwa Sanchalanasana | Equestrian Pose (Right leg back) | Inhale |
| 5 | Parvatasana | Mountain Pose / Downward-Facing Dog | Exhale |
| 6 | Ashtanga Namaskara | Eight-Limbed Salute | Exhale / Transition |
| 7 | Bhujangasana | Cobra Pose | Inhale |
| 8 | Parvatasana | Mountain Pose / Downward-Facing Dog | Exhale |
| 9 | Ashwa Sanchalanasana | Equestrian Pose (Left leg forward) | Inhale |
| 10 | Hasta Padasana | Standing Forward Fold | Exhale |
| 11 | Hasta Uttanasana | Raised Arms Pose | Inhale |
| 12 | Pranamasana | Prayer Pose | Exhale / Neutral |
How to Breathe During Surya Namaskar ?
[Suggested image placement: surya-namaskar-breathing-sequence.webp Alt text: Surya Namaskar breathing pattern for each pose]
Breathing in Surya Namaskar is not an afterthought. The sequence is built around the relationship between movement and breath opening movements coordinate with inhales and closing or folding movements coordinate with exhales. When you rush through the sequence without attention to breathing, it becomes purely physical exercise. When you coordinate breath with movement, even a slow 2-round practice becomes far more purposeful.
A simple way to think about it:
- Inhale as you open, lift, lengthen or extend
- Exhale as you fold, lower, close or transition downward
- Neutral breath in the starting and closing position
Beginners often find that they forget to breathe entirely when they are focused on remembering the sequence. This is normal. Start by simply being aware of whether you are holding your breath. Even taking full breaths without perfect coordination is a good starting point. As the sequence becomes more familiar, the breath coordination begins to feel natural rather than effortful.
Avoid breath retention unless you are working with a qualified instructor who has specifically introduced it as part of a traditional pranayama-based practice.
Surya Namaskar for Beginners: How to Start Without Rushing
The most common beginner mistake is trying to move through Surya Namaskar at the same speed as someone who has been practising for years. Speed is not the goal at any stage, but especially not at the start.
As a beginner, you do not need:
- A fast, flowing sequence
- The ability to touch the floor in a forward fold
- A large number of repetitions
- Perfectly straight legs or arms
What is genuinely useful at the beginning:
- Learning one position at a time until it feels recognizable
- Pausing between poses if needed the sequence does not have a required tempo
- Using modifications freely and without apology
- Focusing on where your breath is during each transition
- Repeating a small number of rounds with care rather than accumulating repetitions carelessly
How to Modify Sun Salutation for Your Current Mobility
[Suggested image placement: beginner-modifications-sun-salutation.webp Alt text: Beginner modifications for Sun Salutation poses]
If Your Hands Don’t Reach the Floor
Bend your knees as much as you need to in the forward fold positions. Place yoga blocks on either side of your feet if blocks help you maintain a longer spine while keeping some connection to the floor.
If Plank or Eight-Limbed Salute Feels Too Demanding
Lower your knees to the mat before lowering your chest. You can also move through a supported tabletop transition. There is no disadvantage to using a modified lowering until your shoulder and arm strength develops further.
If Cobra Feels Too Deep
Keep your elbows clearly bent and lift only a few inches. A low, supported Cobra is safer and more appropriate for building the movement pattern than pushing into a deeper backbend before your back is ready for it.
If the Downward-Facing Position Feels Difficult
Keep your knees generously bent to maintain the length in your spine. Over time, as your hamstrings and calves become more accustomed to the position, the knees can straighten further. There is no deadline.
If Balance Feels Unsteady
Slow down. Move at a pace that allows you to feel grounded between each transition. You can also widen your stance in the standing positions if a narrow base feels uncertain.
Modifications are not a lesser version of the practice. They are how you practise in a way that is appropriate for where you are right now.
Surya Namaskar Benefits: What Does Research Actually Suggest?
Full-Body Movement and Mobility
Surya Namaskar moves through a varied range of positions standing, folding, lunging, weight-bearing and spinal extension. This means different parts of the body are engaged across the sequence in a way that a single static pose would not provide. Whether or not the sequence “works every muscle,” it does create varied movement demand across the body.
Strength and Muscular Engagement
Several transitions in Sun Salutation involve supporting body weight through the arms, shoulders and trunk. The lunge positions require leg strength and stability. Over time, repeated practice of the sequence may support muscular engagement across these areas, though outcomes will depend on individual starting point, technique and overall activity level.
Flexibility and Range of Motion
Moving repeatedly through the forward fold, lunge and spinal extension positions may contribute to range of motion in those areas over time. Flexibility outcomes vary significantly between individuals and are affected by consistency, technique and a range of other factors.
Cardiovascular Demand Can Vary With Pace
Whether Sun Salutation qualifies as moderate or vigorous physical activity depends significantly on how fast you move, how many rounds you complete, your current fitness level and your technique. A systematic review of yoga’s metabolic intensity found that yoga intensity varies widely and that some Surya Namaskar sequences have met moderate-to-vigorous thresholds in individual studies. It would not be accurate to state that Surya Namaskar always qualifies as vigorous cardio, but it would also be an understatement to treat a dynamic round of Sun Salutations as negligible physical activity.
What Current Research Suggests Overall
A 2026 systematic review of Surya Namaskar research examined 14 studies that met the review criteria. Overall findings were promising across several physical, physiological and psychological outcomes. However, the review also found that results varied substantially between study designs, populations and protocols, and that further high-quality randomized research is needed before firm conclusions can be drawn. This is the honest picture: the direction of the evidence is encouraging, but Surya Namaskar is not a medically proven intervention for specific health outcomes. A review of Surya Namaskar practice and research also supports the idea that the coordinated movement-and-breath approach of the sequence has value beyond purely physical conditioning.
Can Surya Namaskar Help With Weight Management?
Sun Salutation is physical activity. More dynamic sequences that are performed over extended periods can increase exercise intensity and energy expenditure. Weight management, however, is influenced by a broad combination of activity levels, nutrition, sleep, stress and individual physiology. Surya Namaskar alone is not a weight-management solution, and it would be misleading to frame it that way. It can be a meaningful part of an active lifestyle, but that is a different claim from guaranteeing specific body-composition results.
How Many Surya Namaskars Should a Beginner Do?
First-Time Beginner
Focus on learning 1–2 slow rounds or even just one side of the sequence carefully rather than accumulating repetitions. The goal at this stage is familiarity with the sequence and basic breath coordination, not volume.
Once the Sequence Feels Familiar
Gradually increase based on your comfort, how your breathing holds up and how your body feels during recovery. There is no standard prescription. Some people build to 4–6 rounds over several weeks. Others settle at 3 rounds and find that sufficient for a regular practice. Let your own experience guide the progression rather than an externally imposed number.
Experienced Practice
Volume can increase with experience, but the quality of each round breath coordination, alignment, smooth transitions should remain more important than reaching a specific round count.
Do You Need to Do 108 Surya Namaskars?
No. The number 108 holds traditional and symbolic significance within various yogic and Vedic traditions, and 108 Surya Namaskar challenges are practised as meaningful ritual events in some communities. However, 108 rounds is not a requirement for gaining value from a Sun Salutation practice, and attempting 108 rounds as a beginner would be inappropriate and counterproductive. A consistent practice of a smaller number of well-executed rounds is far more useful than chasing a number that carries no universal obligation.
What Is the Best Time to Do Surya Namaskar?
Morning
Morning practice is both traditional and practically convenient for many people. Practising before the day gets busy means the session is less likely to be postponed. Some people also find that movement in the morning helps them feel more alert and ready for the day ahead though this is an individual experience rather than a guaranteed physiological effect.
Later in the Day
Sun Salutation can also be practised in the afternoon or evening depending on your schedule, energy levels and meal timing. It is sensible to leave a reasonable gap after a large meal before practising. Evening practice is valid for those whose schedules or preferences suit it. Sunrise is a traditional and often meaningful time to practise, but it is not medically mandatory.
The most useful time to practise is the time you will actually practise consistently.
Hatha Surya Namaskar vs Ashtanga Sun Salutation: What’s the Difference?
| Hatha Surya Namaskar | Ashtanga Sun Salutation |
| Generally more deliberate pace | Generally more flow-oriented and continuous |
| Well-suited for learning individual positions | Emphasizes smooth, uninterrupted transitions |
| Includes Eight-Limbed Salute (Ashtanga Namaskara) | Includes Chaturanga Dandasana in standard form |
| Pace can be freely adjusted | Typically more dynamic; linked to breath count |
| Variations depend on lineage | Sun Salutation A and B are standardized within Ashtanga practice |
| Recommended starting point for most beginners | More appropriate once basic poses feel stable |
Canada Yoga Studio’s dedicated Surya Namaskar Workshop in Calgary may cover Hatha Surya Namaskar, Ashtanga Sun Salutation A, or a combination of A and B depending on the level and focus of the program.
If you are specifically interested in exploring the Ashtanga approach, the 7-Day Ashtanga Vinyasa Workshop introduces Sun Salutation A early in the program and then progresses to Sun Salutation B and broader Vinyasa sequences.
For those who prefer to explore Sun Salutation within a broader traditional context, Canada Yoga Studio’s Hatha Yoga sessions include a deeper introduction to the 24-step traditional Surya Namaskar sequence with attention to alignment, breathing and mindful transitions.
7 Common Surya Namaskar Mistakes Beginners Should Avoid
1. Moving Too Fast Before Learning the Sequence
Rushing creates a situation where you are guessing the next position rather than moving intentionally. Learn the sequence at a slow pace first. Speed, if desired, can come later.
2. Forgetting to Coordinate Breathing With Movement
When the sequence is new, it is easy to hold the breath while concentrating on the pose. Keep coming back to the breath, even if the coordination is not perfect at first.
3. Forcing the Forward Fold
Forcing straight legs in the forward fold at the expense of a rounded spine is a very common pattern. Bending the knees generously to keep the spine long is the better choice.
4. Collapsing Into the Lower Back During Raised Arms or Cobra
In both Hasta Uttanasana and Bhujangasana, the instinct to go higher often creates compression in the lower back. Think of length rather than depth.
5. Letting Alignment Break Down to Complete More Rounds
Adding more rounds while your technique deteriorates is not a productive trade. Fewer rounds with maintained alignment will serve your practice better over time.
6. Comparing Your Pace With Experienced Practitioners
If you are practising alongside someone who has done Surya Namaskar for years, their natural pace will look effortless. This is a result of repetition, not talent. Your own pace is appropriate for where you are.
7. Thinking More Repetitions Automatically Mean a Better Practice
Volume has no automatic relationship to quality. A thoughtful 3-round practice is more valuable than 12 careless rounds where the breath is ignored and alignment is abandoned.
Which Surya Namaskar Practice Is Right for Your Level?
If You’re Completely New
Begin with a slow Hatha sequence. Learn positions one at a time, use modifications freely, and start with just 1–2 rounds. The goal is familiarity and breath awareness, nothing more at this stage.
If You Know Basic Yoga Poses
Focus on making transitions smoother rather than adding repetitions. Work specifically on connecting each movement to the correct breath. Begin to reduce the pauses between positions as the sequence becomes more natural.
If You Prefer a Dynamic Practice
Explore Ashtanga Sun Salutation A once you are familiar with the basic shapes. Sun Salutation B can follow once A feels established. The focus shifts from individual positions to continuous, breath-linked flow.
If You Have Specific Mobility Limitations
Work with a customized Hatha variation. Use props, maintain smaller ranges of motion, and consider working with an instructor who can adapt the sequence to your specific situation. Canada Yoga Studio’s guided Surya Namaskar Workshop can help identify appropriate variations.
If you feel you need a broader beginner foundation before focusing on Sun Salutations specifically, the Beginner Holistic Yoga Flow Workshop offers a structured starting point across multiple areas of yoga practice.
A Simple 10-Minute Surya Namaskar Practice for Beginners
This is a practical structure for a short, complete session. It is not a prescription adjust it freely to suit your own needs.
2 Minutes Warm-Up
- Gentle shoulder rolls and wrist circles (wrists will be weight-bearing during the sequence)
- Cat-Cow or a few slow spinal movements
- A gentle neck release left and right
5 Minutes Slow Sun Salutations
Practise 2–3 rounds of the 12-position Hatha sequence at a pace that allows you to pause briefly in each position. Focus on one thing at a time today it might be the breath, tomorrow it might be the forward fold modification. You do not need to refine everything in one session.
2 Minutes Gentle Cool-Down
- Child’s Pose for a minute or a comfortable seated forward fold
- A gentle seated spinal twist on each side
1 Minute Natural Breath Awareness
Lie down or sit comfortably. Let the breath settle back to its natural rhythm. Notice how your body feels compared to before you started. This brief closing moment completes the session in a way that feels intentional rather than abrupt.
Surya Namaskar: Quick Takeaways for Beginners
- Surya Namaskar is a sequence, not a single yoga pose. Understanding the structure matters more than performing it quickly.
- The commonly taught Hatha form uses 12 positions, but variations exist across different yoga traditions this is normal, not a contradiction.
- Breath coordination is part of the practice, not an optional extra. Even basic breath awareness makes the sequence more purposeful.
- Beginners should prioritize alignment and smooth movement over speed or repetition. A slow, well-organized round is far more useful than a rushed one.
- You do not need to complete 108 rounds to have a meaningful Surya Namaskar practice. Consistent, thoughtful practice matters more than volume.
Surya Namaskar Frequently Asked Questions
What are the 12 poses of Surya Namaskar?
The 12 positions in the traditional Hatha sequence are: Pranamasana (Prayer Pose), Hasta Uttanasana (Raised Arms), Hasta Padasana (Standing Forward Fold), Ashwa Sanchalanasana (Equestrian Pose right leg back), Parvatasana (Mountain Pose/Downward-Facing Dog), Ashtanga Namaskara (Eight-Limbed Salute), Bhujangasana (Cobra Pose), Parvatasana again, Ashwa Sanchalanasana (left leg forward), Hasta Padasana, Hasta Uttanasana and Pranamasana. Exact names and sequences can vary between traditions.
Is Surya Namaskar good for beginners?
Yes, with appropriate modifications. Beginners do not need flexibility, strength or experience to start. The key is learning the sequence at a slow pace, using bent knees, blocks or other modifications as needed, and not worrying about completing many rounds. Starting slow and building familiarity over several sessions is the most sensible approach.
How many Surya Namaskars should a beginner do?
Begin with 1–2 slow rounds, or even just one side of the sequence, while you are learning. Quality and breath awareness are far more important than quantity. There is no standard number that every beginner must achieve. Increase gradually and only when the sequence feels comfortable and controlled.
What is the correct breathing pattern for Surya Namaskar?
As a general rule: inhale when you open, lift or extend, and exhale when you fold, lower or close. Opening movements like Hasta Uttanasana coordinate with an inhale. Forward folds and lowering movements coordinate with an exhale. The starting and closing Prayer Pose can be a neutral breath. Exact breath cues can vary slightly between traditions.
Can I do Surya Namaskar every day?
For most people, daily practice is appropriate, particularly at a moderate pace and volume. Rest when your body genuinely needs it if you are recovering from illness, injury or feeling unusually fatigued, rest is a valid choice. Daily practice over an extended period is how the sequence becomes natural and fluid. There is no universal rule that requires a rest day between sessions at low-to-moderate volumes.
What is the best time to do Surya Namaskar?
Morning practice is traditional and practically common. Practising in the morning means the session is less likely to be missed as the day gets busy. That said, practising at another time of day that suits your schedule is also fine. Allow a reasonable gap after a large meal before practising. The most effective time is the one that fits your life consistently.
Is Hatha Surya Namaskar different from Ashtanga Sun Salutation?
Yes. Hatha Surya Namaskar tends to be more deliberate, includes Eight-Limbed Salute (Ashtanga Namaskara) as a lowering position, and allows for a pace that can be adjusted freely. Ashtanga Sun Salutation A replaces Eight-Limbed Salute with Chaturanga Dandasana and emphasizes continuous, breath-linked flow. Sun Salutation B adds further positions and is more demanding. Both are valid. Hatha is generally more accessible for beginners.
Do I need to do 108 Surya Namaskars?
No. 108 rounds carries symbolic meaning in some yogic traditions and is sometimes practised at seasonal events or as a dedicated challenge. It is not a requirement, and attempting it as a beginner would be inappropriate. A consistent practice of a smaller number of well-executed rounds is far more useful than accumulating repetitions without proper foundation.
Build Your Surya Namaskar Practice One Mindful Round at a Time
The most important thing to understand about Surya Namaskar is that it is not about how many rounds you complete. It is about learning the sequence well enough that movement and breathing start to feel connected rather than separate. Begin by getting familiar with the 12 positions. Then focus on the breath. Then let the transitions become smoother. Modifications are part of the practice, not a workaround. Traditions vary, and no single version of Sun Salutation is the only legitimate one. What matters is that you are practising with awareness and building a foundation that can grow.
Want to learn Sun Salutations step by step rather than guessing your way through the sequence? Canada Yoga Studio’s Surya Namaskar Workshop in Calgary offers guided alignment, breath coordination and practice variations suited to your level whether you are just starting or looking to refine what you already know.